

Playing Against Hard Control in SEC
How to analyze the matchup, plan your approach, and close the game out before they can stabilize.

Hey y’all, it’s fellow SYC member Huamin here, coming in with something very different than normal. With Hard Control seemingly on the rise (and actually played a decent amount locally in SoCal), I’ve gotten questions on how to play the matchup (and if I could provide reps into Hard Control). It’s definitely hard to do the latter over a Substack article1, but as for the former, I think there’s a lot of insight I can add to the discussion.
One thing though, before I get started. I do want to stress that Hard Control has some of the most polarizing matchups in the game. (By this I mean matchups are rarely 50/50s, they usually skew wildly from 90/10 to 10/90.) This can be frustrating for some people, as oftentimes it feels like you’re doing everything right in a game and still lose every time. Some decks just don’t have the tools to effectively threaten Hard Control (and some have the tools to threaten Hard Control a little too well…). If you find yourself losing every game, you might need to take a step back and reevaluate your deck and card choices, rather than blaming it on misplays or luck. Or, just be comfortable that sure, your deck loses to Hard Control, but it does well into the majority of the field. Hard Control is never going to be more than a small niche (as there are too many players that dislike playing it), so be wary of teching too much towards it.
Anyway, let’s dive into it.
Your Plan of Attack
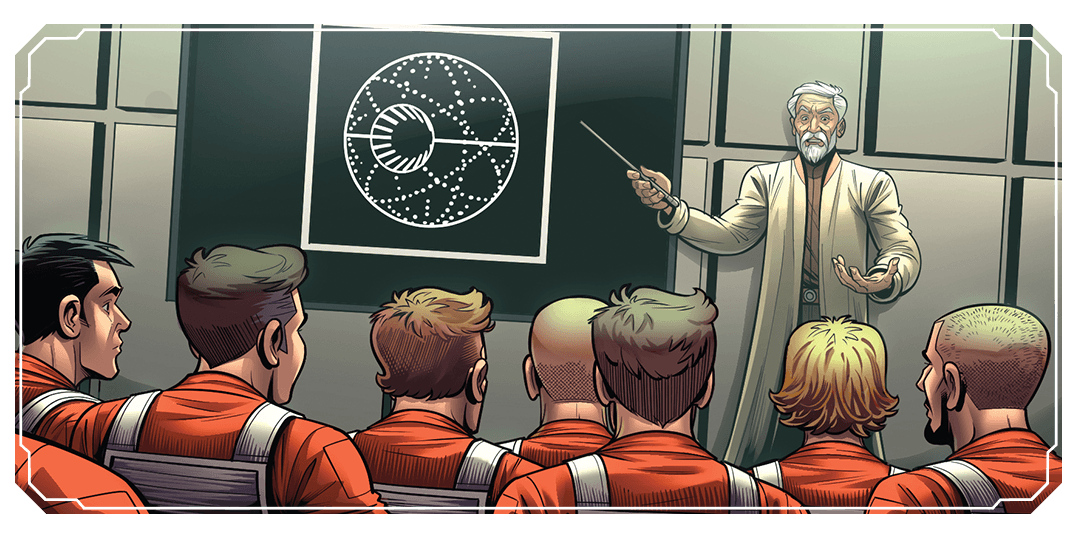
Before I actually talk about Hard Control, the first step is understanding your deck and how you want to approach the matchup. Broadly speaking, there are three ways to attack Hard Control. They are, “Aggression”, “Attrition”, and “Mill”.
Note that even if you are supposed to play one way, you may need to swap playstyles and either reign back the aggression, or go all in depending on your draws and how your opponent is navigating the matchup.
Aggression
There’s only one place to attack and that place is your opponent’s face. Embrace your inner SMOrc. Push damage as fast as possible and as often as possible. Hopefully by the time your opponent is able to wipe the board and stabilize, you have enough reach effects to close the game out… if they even get there. If your deck is designed to play this way, it’s pretty obvious that your deck will need to play this way to win against Hard Control. Examples of decks that do this include Sabine ECL and Vader4 Yellow. However, even if your deck is not designed for this, you may need to default to this if you are unable to compete on other axes. An example of one such deck might be Talzin Red, depending on your draws.
Attrition
Contrary to popular belief, Hard Control decks do not actually always have the answer to everything you play. Your job is to show them that. A way you can tell if you are able to attrit a Hard Control deck when you can effectively answer every threat that your opponent will play. (And yes, sometimes your deck doesn’t have an effective answer, but your opponent’s deck does. Forcing your opponent to SLB their own Avenger is an effective answer.) The path to victory lies in making their cards as inefficient as possible by diversifying threats to run them out of removal, or slowly chip them down when they refuse to be inefficient with their cards. Examples of decks that do this include Yoda DV and Han2 Blue Force.
Mill
You know if you should be milling your opponent out. This article isn’t for you.
Burn
There is a 4th way in which you can attack Hard Control, which is run so many damage effects that they are just going to die even if they remove everything you play. However, this is locked to very specific Leaders and decks (notably basically Boba4 and Piett in the current meta). This is also a way to make Hard Control somewhat miserable to play. The gameplan here is simple: just keep playing your units and events that do damage to base, and they’ll eventually die.
Navigating Each Part of the Game
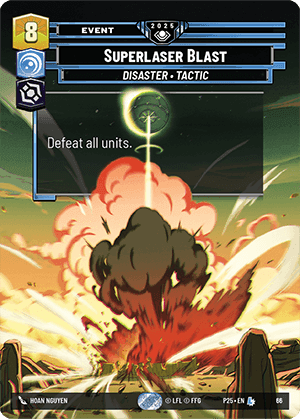
In my opinion, there are usually three general periods in a game against Hard Control. These are all centered around an extremely polarizing card: Superlaser Blast. There may be a couple of exceptions (Qi’ra and Topple the Summit/OB, Legacy Run), but the 8r turn usually marks a turning point where a Hard Control deck can answer even the widest of boards with a single Action. I like to break these down into the Early Game (2r to 6r), Preparing for Board Wipe (7r to 8r), and the Late Game (9r and beyond). Of course, these are counting the Control player’s resources, not your own, as you need to be cognizant of what they can do to you.
A word of caution for Space decks: Hyperspace Disaster is a card that exists. Many Hard Control builds will run 2x mainboard and 1x sideboard. You may need to shift all of these time periods down by 1r to account for the earlier board wipe.
Early Game (2r to 6r)
Whether you’re trying to Aggress, Attrit, or Burn the Hard Control player out of the game, you should still follow the same general principles in the early game. The goal should be to put on as much pressure as possible while they are still relatively limited to 1 card per turn. As a general principle, going wide is better than going tall (play 2r + 2r on the 4r turn, instead of a 4r card, especially if you’re Aggro), and sticky units (Karis Nemik, Cobb Vanth, sometimes Chewbacca and LTP) can cause extreme headaches to a Control player. Upgrades can be scary to play, but if you can Action churn until they tap out, it’s free reign for your General’s Blade or whatever to be slapped down on Gungi. Just make sure you’re not passing on free damage by letting them remove your unexhausted units!
It is very rarely useful to trade into a Control player’s units during this portion of the game, as they are almost always incentivized to trade into you rather than push damage to base (which is worthless to them). However, you need to balance that with the possible threat of OB against BGV, or possibly losing out on more damage if they are able to take several value trades against you. Make your best judgement, but when in doubt, face is probably the place for any strategy. Remember, your board state doesn’t matter when they play SLB (usually), but damage on base is eternal (at least until they heal it with their third Vigilance).
Flipping Your Leader
Oftentimes, it’s right to deploy your Leader on the first round you are able to. However, there are certain points where it might be beneficial for you to delay your flip. Your Leader is a free unit that you can play. It’s a threat that they have to deal with, and they often only have a few answers to it. Fighting against Control can be about making their choices awkward, and one of those ways is to overload their removal. Make them have too many things they need to answer at the same time, without access to SLB. If you’re flipping your Leader onto an empty board only to get Power’ed or onto a crowded board only to get SLB’ed first Action next turn, that may not have been the best value for your Leader deploy you could have gotten. Next time you flip your Leader against Hard Control, think about how many attacks you were able to get because of it (either from the Leader itself or another unit because they were forced to answer your Leader). If the answer was 1, maybe think about how you can bump that number a bit higher.
Preparing for Board Wipe (7r to 8r)
As they get closer to SLB territory, you need to start asking yourself the hard questions. For Space decks, replace SLB with Hyperspace when necessary.
Can I stop them from playing SLB?
Several decks have the luxury to play cards like Bazine, Galen, or Spark of Rebellion. If you have one such answer, feel free to overcommit and make them extremely unhappy when they are unable to effectively wipe your board.
If you do not have this option, or if you saw multiple board wipes and could only answer one, you need to start formulating a game plan.
If I overcommit to board and get SLB’ed, do I have enough reach to finish the game?
If the answer is “Yes”, well, feel free to barf out your hand; the game is probably over anyway because you put on too much pressure in the early game.
If the answer is “No”, you need to ask the next question.
Can I win the game without overcommitting to board?
If the answer is “Yes”, from this point on, you will usually be attempting to juggle what I refer to in my head as the “Minimum SLB Threshold”. This is the level where the board is threatening enough that the Control player feels as if SLB is their only answer to it. This is an extremely wibbly wobbly zone and subject to the Control player’s personal interpretation, so please see the footnote for more information.2 Regardless, your goal is usually to hit this threshold as often as possible with every rebuild, as the more they play SLB the less they have, and every turn playing SLB is a turn not developing threats. Regardless, if you answered “Yes” here, congratulations, you have entered a war of attrition, no matter what your deck was originally supposed to do.
If the answer is “No”, you have found yourself in an unfortunate situation where you must play into their SLB. #TEG (Make them have it.) If they have it, well, you probably lost, but if you didn’t overcommit, you lost anyway. Play to win, don’t play to not lose.
Note that sometimes “overcommiting” to board isn’t the same thing as tapping out all your resources to play every card you can. It’s about how many cards and what cards are you committing in an effort to force them to wipe the board. For example, if I play 3 Nightsister Warriors, yes, this is a very wide board that is mostly answered only by Snoke or SLB, especially if my Talzin leader is still alive. But it’s also not really overcommitting, as I’m going to recoup the cards from my Nightsisters after the Blast and can go on with my day.
The other way to not “overcommit” while still playing as much as possible is to play units that are immune to SLB. It can be tempting to just jam every LTP or Chewie down as soon as you find them and #TEG. Sometimes it’s more beneficial to hold them until their 7r turn, then diversify your board with LTP and Fett’s Firespray, while you still have your Boba4 on Punishing One to make both SLB and Snoke awkward. (Here they still probably SLB but it certainly doesn’t feel good, and they’re probably dead after you rebuild and still have an LTP.)
Remember, if your answer to 3 was “Yes”, then when they play that SLB on your board, that’s a win for you. It’s not a loss because you were prepared for it, and you set yourself up to play around it. They were unable to develop board, where you have an entire turn’s worth of resources to rebuild and retake control over the game again. If your answer to 3 was “No” and you got your entire board wiped, well, you did what you could. Better luck next time.
Late Game (9r and beyond)
If you’ve entered this area and you still think you have a chance of winning the game, this is where things get tricky. Many decks cannot handle SLB into SLB, and if you’re one of them, you need to just keep pushing and overcommit and hope they don’t draw the second one. Most Aggressive and Burn decks fall into this category, but those decks either have tools to close out after (or even before!) the first board wipe, or can put so much pressure that their opponent did not feel safe holding two board wipes, even if they drew them.
If you’ve entered the Attrition war (of your own volition or not), you’re now in the area where you need to keep dancing around that “Minimum SLB Threshold” (assuming you think you can still play around SLB). However, the Control player has more and more options now besides “Nuke the board”. There’s not much advice that I can give besides the following:
Remember this is a war of attrition. Force them to expend more than you on each card you play. Hero Green excels at this with Home One, Kelleran Beq, and Queen Amidala, but other colors have options too, like units that draw (KAM, Owen Lars, Nightsister Warrior), units that kill on play (Luke, Maul, Dev4), or units that discard cards from hand (Ahsoka, Bodhi). Hero Green just does it, y’know, way better than the other colors.
Know what options your opponent has for removal. Make it as awkward as possible. It is sometimes a good idea to keep in mind what’s in their discard pile. (Have you seen any SLB? What about Vigilance or Timely Intervention?)
What removal have they used on you recently? Was it inefficient? That can be a clue to how you should start stressing their removal. (No Glory on Battlefield Marine probably means they don’t have Vigilance or Open Fire, for example, so play things that No Glory normally would be used to answer, like Obi1, or multiple small units that Vigilance or Open Fire would answer.)
Did they play SLB when you feel like they should have? Or did they take delaying action to try and stall for SLB? That can be an indicator of whether they have it or not, and sometimes you need to go for the kill if you feel like the game is going to go South relatively soon.
Keep chipping damage when you can to their base. Take your damage when you can. The more damage to their base, the easier it is to force them to the “Minimum SLB Threshold” with less units.
Keep up the pressure. Try not to let them develop board; the moment they can flip the script on you and you’re stuck answering them is probably when the tables have turned and you’re probably going to lose. Many of their big cards come down and kill a single unit (Avenger, Dev1, Anni); if you’re in a position where they can get sufficient value from one of those, that’s real bad.
Reach effects: Reach is an umbrella term that I am going to use for any damage that is unexpected. This means your For A Causes and Surprise Strikes and Cassians and Krayts, but also Confiscate on an Entrenched can be “Reach”. Reach can be very important for closing out a game, but remember, it’s good for closing out a game. It’s not the best for getting to the point where Reach will close out a game (unless you have so many effects like this, like Sabine or Boba4 Green). A rule of thumb is get your damage in with your units before your damage with Reach, as Reach effects are more guaranteed. When you spend resources solely to push damage, it gives your opponent the ability to develop board and get closer to closing out a game. Make sure you’re closing it out yourself or putting them in a position where they are constantly in check.
Flavors of Hard Control
Much of what I talked about above was about navigating around the specific answers that a Hard Control deck brings, so it would be remiss of me not to talk about specific Hard Control decks in the meta right now.
There’s a pretty simple metric I use to determine whether a deck is Hard Control or not. It might not be the most accurate, but I find it works decently enough. If a deck has mill as a secondary win condition (basically, they run both Vigilance and Restock, but weird outliers like Trench DV can qualify), they are Hard Control. If they don’t, they’re not. In the SEC meta, the only decks that meet this mark to my understanding are Blue Villainy decks.
Currently, there are three broad categories of Hard Control, based on their color combination. They are, in order of popularity, BGV, BRV, and BYV. Let’s get started breaking down their differences, starting from top to bottom. Note that this is going to be a broad strokes overview, so certain nuances may be lost.
Blue Green Villainy
Example Lists (Ordered by average number of threats in deck):
The main reason to play BGV is ramp. The faster you can get to SLB, the more fun everyone has in the game. The second reason to play BGV is more Triangles in Space, including SOR Dev, arguably the best one in the current metagame. Couple that with things like Timely Vader/Walker, OB/OB Lite, and Palp’s Return for the mirror, and you have a very robust and well rounded deck.
There is, however, a lot of nuance into the way different versions of these decks function. Qi’ra DV can oftentimes not even be played as Hard Control, and opts for a more midrange-y style build without running Restock and SLB, so try to figure out what they’re doing to play around it. Palp1, Palp6, and Kylo5 will try and use the gigantic tempo swing from their deploy to completely take over board and strangle the game. Iden is almost always a very pure Event based removal build, where after you kill two Capital Ships, they’ll be like, “Whelp, I tried to win with units. Back to mill I guess”.
Blue Red Villainy
Example Lists:
Literally no other BRV Hard Control has made a Top 8 appearance, while Dedra has 3 (with 1 being from a very small PQ, however)
Have another Dedra Blue
There was that one video on Qi’ra Red, but I think the deck is bad
Other possibilities are Bossk Blue, Pre Vizsla Blue, Colossus instead of Blue 30 (which I think is wrong, but sometimes people make bad choices)
The main reason to play BRV is the density of early removal. It pairs this with good card draw and leader abilities that work with Hard Control’s playstyle (Dedra, Bossk, Pre Vizsla), though this has been challenged a little bit with Palp6 (and to a lesser extent, Kylo5).
Unlike BGV, BRV decks hew mostly to very similar styles of Event based, 1 for 1 removal (though LCIW has been a godsend this set against 1 drop builds). BRV usually ends up running fewer threats and oftentimes defaults to mill versus decks with more than a smattering of hard removal cards. However, the dual threat of Avenger and Krayt after an SLB can be difficult to navigate, especially if there was not enough pressure on them early in the game to force them to answer your rebuild.
Blue Yellow Villainy
Example Lists:
Umm… no one is actually playing this I think in this set
Probably just don’t assume it’s Hard Control unless you really see some weird stuff happening (repeated kill spells, etc.)
Or if it’s Thrawn1 Blue/Colossus, Trench Blue/Colossus, etc.
Actually no one is playing like any form of BYV at all, so…
The main reason to play BYV is that it does hand disruption and Event recursion, or maybe it’s access to earlier board wipe and stall? (Thrawn4 Yellow with The Legacy Run or Evacuate plus Outmaneuver/NGTMD in general?) Either way, BYV’s hallmark is that it completely destroys other Hard Control, but it oftentimes struggles against other decks unless it can draw specific cards in time. I don’t think I would recommend playing it, so I don’t think I would recommend digging too deep into how to counter it either.
Blue Blue Villainy
Example Lists:
I hope I don’t have to add anything else here
Sometimes someone just needs to do something offbeat and win a PQ. The main reason to play BBV is for Vigilance. In fact, it is the only BB card worth playing in Hard Control (I guess Equalize is your bootleg LCIW in sideboard, and it’s always been “fine”.) Anyway, the deck functions like any other point and click removal deck, just with Plot Units. Basically Palp6 DV but with 2 more HP, no ramp, and 4 cost Vigilance. If people start copying this, we might also start to see Iden Blue 30 or Colossus come back. (Probably not, Palp6 works very well with Colossus in a way Iden does not.)
Recap
If you made it this far, I hope my perspective was helpful for you. Again, there isn’t really any good substitute for experience, as the “Minimum SLB Threshold” in grindier games is only something that can be found with practice. And oftentimes, if a player misjudges it, that can be the deciding factor in a game (giving breathing room to allow for development, expending too many resources on too little return, or attempting to develop when it was unsafe to do so). But also, if you felt like you were just flailing around against Hard Control, I hope this gives you a basis to plan how to tackle what can be a daunting matchup.
And for all of y’all that wanted to see my updated take on the Mill Meta (as unfortunately, it totally pertains to this), uhh… maybe next time. (Definitely not next time. Maybe not ever as I hope we don’t have to deal with it after Rotation.) Anyway, that’s all from me. Peace y’all.
If you want reps into Hard Control, you can always hit me up on Discord for online games as well, or find me at locals (though that’s kind of inconsistent, and I’ll usually only have one flavor to bring, which currently is Kylo5 DV). Or hit me up on Discord to find me at locals, I guess.
As stated above, the “Minimum SLB Threshold” is the threshold where the Control player feels pressured enough into playing SLB (or an equivalent board wipe like Hyperspace or Nebula). The easiest way to reach this threshold is to have two to three units that are all threatening lethal with one attack, which is why racking up damage to base is so crucial against Control. Even if it doesn’t kill them, it can hamper later options and force them into expending resources they did not wish to.
However, there are two caveats. Several Control decks have options to get out of two units checking you. Common ones include Vigilance (Heal and Defeat), Timely Vader/Walker, OB, and Dev1. (Notice how most of these examples are Green? That’s one of the reasons why BGV is so popular and well rounded.) However, several of them are extremely conditional (Timely Vader needs a 5 HP or less Ground unit, OB needs a large unit to fire off of) or merely a delaying action (Vigilance oftentimes does not improve the board state and takes 6r, leaving not much left to salvage the situation, Timely Walker costs 10r and does the same).
However, I would caution you to pick and choose your battles. Sometimes, you have the luxury of playing around each and every option your opponent can present. This is easier at lower resource counts, as some options are locked away. But sometimes, you can’t play around everything. The good news is, though, your opponent almost always doesn’t have everything. As the one setting the pace of the game, you get to decide what you want to lose to in those situations (unless you lose to any answer, which sucks to suck I guess).
The other one is less straightforward. Oftentimes you can’t get a Control player into check because you couldn’t rack up damage early. So what, then, does this “Minimum SLB Threshold” look like? Is Yoda Leader plus Luke enough? What if it was Yoda Leader plus Luke plus Typho? The answer, of course, is it varies on the game state. How comfortable is the Control player in developing board versus answering board? Damage on base is a huge part of it, but it’s often not the whole story. For example, I might feel like I have enough leeway to drop a Dev1 on a Yoda Leader, Luke, and Typho if I have only 12 damage on base and 2 OBs in hand, but I might not feel the same way if I only have SLB and Dev1 in hand and there’s 24 damage on my base against even just Yoda and Luke.